Fix a Sagging Plasterboard Ceiling

Tools: Chalk line; stringlines; hammer; electric drill and 5mm twist bit; screwdriver; tape measure; spirit level; straightedge; steps; panel lift (hired); plastering equipment; safety protection.
Materials: 68 x 18mm pine battens; plasterboard sheets; wedges and packers; 30, 75 and 100mm plasterboard screws; plasterboard adhesive, base coat and topping coat.
Step 1
Remove any cornices if they are fitted (see panel, page 230). Find the lowest spot on the ceiling using a level and a 2400mm straightedge. Transfer the location of this low spot to the closest wall by holding the straightedge level against the ceiling and marking the position of its top edge on the wall. You may need to ask somebody to help you hold the straightedge.
Step 2
Measure down 24mm from the mark to allow clearance below the lowest point for 18mm-thick battens plus a 6mm leeway. Use the long straightedge and a spirit level to extend this line around the room, making short tick marks on the end of the straightedge rather than a solid line.
If the lines don’t match when you reach your starting point, level again as necessary until they do. Then snap chalk lines between the corners to create a solid level line around the room.
Step 3
Locate both ends of each ceiling joist. Joists usually run parallel to one another, and are about 45mm wide. They are typically 450 or 600mm apart. Probe with a hammer and nail, locate and mark the centre of each joist at opposite ends of the room. Snap chalk lines between these marks to indicate joist locations. The thin strips of timber seen through the hole here are laths, which were used to support a solid plaster ceiling like this one.
Step 4
Lay out the ceiling for the 68 x 18mm battens. First make a mark 434mm from the wall, to fix the location of the far edge of the second strip. This allows the plasterboard to be fixed along or across the battens. Extend your tape from this point and mark every 400mm to locate the edges of the remaining strips. Repeat this process on the opposite wall and snap chalk lines between the marks.
Step 5
Cut the strips to fit between the walls and temporarily fix them in the centre with a partially driven plasterboard screw.
Step 6
Pack the ends of the battens down so the bottom edge of each is aligned with the level line. Fix them with plasterboard screws long enough to penetrate the ceiling and at least 25mm of the framing. Angle the screws towards the wall if necessary so that they penetrate into solid timber.
Step 7
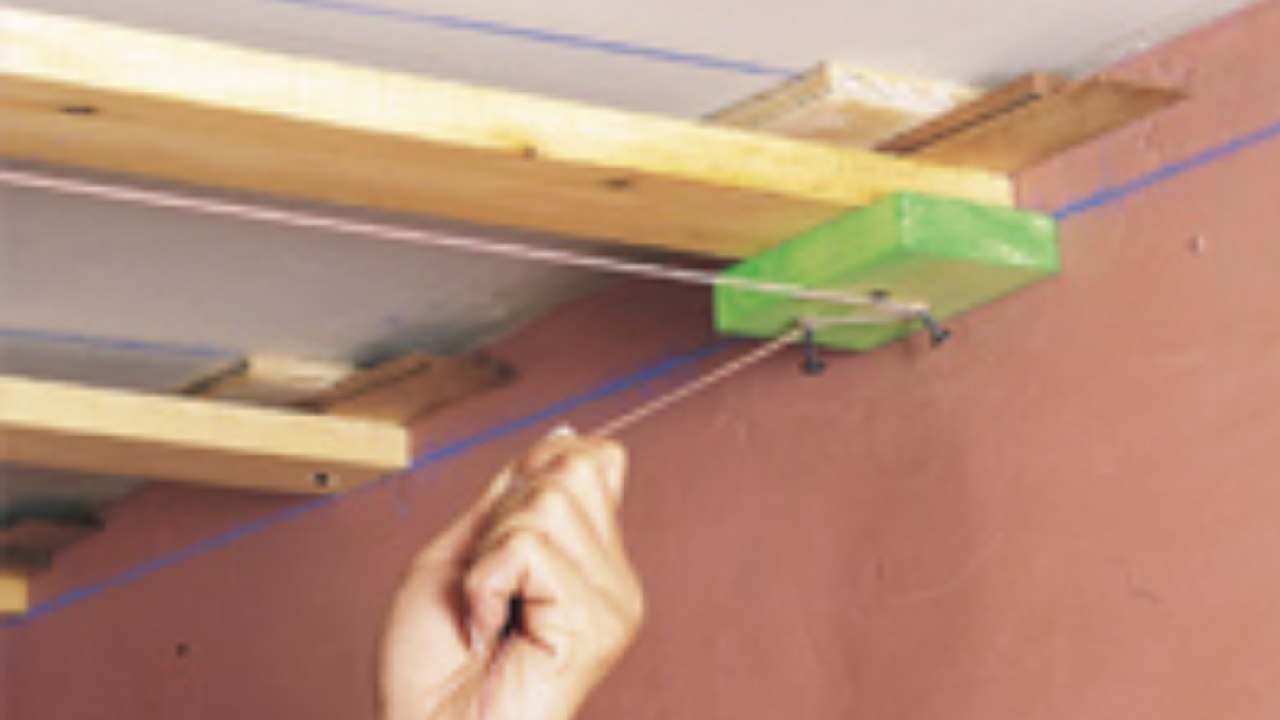
Use spacer blocks and a stringline to straighten the battens. Make sure nothing is touching the string between the two ends, and that it is pulled very tight.
Step 8
Pack each strip so that a scrap of 68 x 18mm timber just fits between the taut stringline and the batten. Double-check the distance between the stringline and the batten after you tighten the screws. The screws will often draw loose plasterboard up tighter onto the joists, requiring you to add more packing.
Step 9
Screw the battens to each ceiling joist after packing it down. Use screws long enough to penetrate the joist for at least 25mm. Double-check the spacing with the scrap of 68 x 18mm timber. Adjust if necessary and retighten the screw. Repeat these steps for each batten in turn.
Step 10
If there are light fixtures on the ceiling, have them removed temporarily by a licensed electrician, and ask him to poke the wire back up into the ceiling. Note the position of fittings so you can make a neat hole in the new plasterboard for the wires to be pulled through when the electrical fittings are replaced after you have finished.
Safety tip
Wear safety glasses and, if necessary, a good-quality P2 dustmask when cutting or drilling the ceiling.
Tackling cornices
If your ceiling has cornices you will have to remove them before you start. To do this, work a putty knife between the wall and the cornice to break the bond, then repeat the process along the cornice-to-ceiling joint. Some older fibrous plaster cornices will also have nails that should be removed – you can often spot these from the bulge where the framing timber has settled, exposing the nail head.
Bear in mind that ceiling repair can be an extremely dusty job, and the older the house, the more dust there will be. If your house is near a busy road, or under an aircraft flight path, this dust is likely to have a high lead content, so effective safety precautions are essential:
- Wear disposable overalls, and discard them when finished.
- Use a cartridge-type respirator.
- Protect your eyes with goggles.
- Seal the room.
- Clean up thoroughly, using a vacuum cleaner with an HEPA filter. Dispose of the bag when finished.
